Categories
Food Recipes

Learn How to Make Ewa Aganyin

These days, I rarely find the sales of Ewa Aganyin (also spelt Agoyin) within our communities compared to how it was commonly hawked in all the nooks and crannies of our neighbourhood particularly in the 90s. In fact, sometimes last year, I was virtually hunting for a local buka around my area where I could actually enjoy the perfect food but to my disappointment I could not locate a place. All I find is the common beans and fried stewed which is distinctively different both in looks and taste to Ewa Aganyin.

ewa aganyi

In my reminiscing, I can not but remember how I and my brothers looked forward to visiting my maternal grandmother as we were sure to eat plenty Ewa Aganyin within the first few days during the Easter break. These days, the younger ones are clueless of the meal and It is fast becoming a meal that is rarely included in our diets particularly for some of us residing in cities.

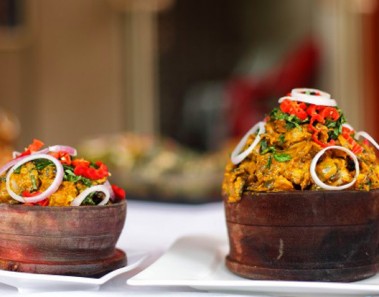
How To Cook Ewa Aganyin

This post will show you how to make the Ewa Aganyin delicacy for your family. No need to go hunting to enjoy the perfect meal.

Ewa Aganyin Ingredients

  • 2 tins cups of brown beans.
  • 2 large white onion bulbs and 2 small bell pepper (Tatashe)
  • 2 tablespoons grated ginger or to your preferred taste.
  • One cup of dried Chilli Pepper – popularly called Shombo by Yorubas.
  • 5-6 cooking spoons of palm oil. You could use slightly more than this amount.
  • Salt and Maggi to taste.
  • Some quantities of powder crayfish.

Instruction For Preparation of Ewa Aganyin Beans

  • Collect some amount of brown beans based on the quantity you would like to cook.
  • Separate the shaft and other unwanted items.
  • Pour some amount of water to clean up the beans and do the process twice.
  • Place your pot on cooker and add some amount of water. You could use a pressure cooker to quicken the cooking time.
  • When water is hot pour your cleaned beans into the pot and allow to cook until the beans had absorbed all the water and very soft. Add salt to taste just before the beans had absorbed all the water. You can always add more water to give room for further cooking at any stage.
  • Use a pestle to mash all the beans until you cannot find a whole bean again.

This is quite a simple procedure…….but what makes Ewa Aganyi actually unique compare to other foods in my opinion is not really the beans but the stew. You will definitely ask for more if you get it right.

Instruction For Making The Ewa Aganyin Sauce

  1. Slice the two big size onions into very tiny pieces and set aside.
  2. Soak the dried chilli pepper in hot water for 10minute to make them absorb and soften. Drain water, rinse once more and set aside with about 1-2 cleaned pieces of fresh bell pepper.
  3. Pour the pepper mix excluding the onions into a blender with little amount of water. Do not turn the pepper to complete puree. It must be in the form pepper to be used for rice stew.
  4. Set aside over a sieve to remove excess water.
  5. Place a non sticky pot over a cooker under low heat and pour palm oil.
  6. Allow the oil to get heated up until it becomes clear. Add the diced onions and stir until the onions turns dark colour but not burnt. This could take some minutes. The continuous frying helps to ensure.a.sandy grainy texture.
  7. Add powder crayfish and ginger, blended pepper, salt and seasoning cube (Maggi). All this must be done under medium heat. Stir continuously and cover pot to allow the mixture to cook for 15-20 minutes until the stew turns dark.

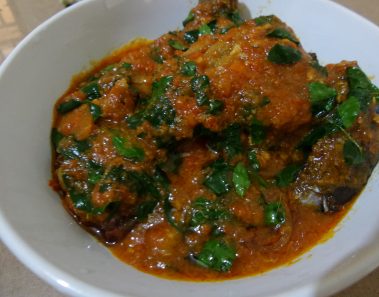
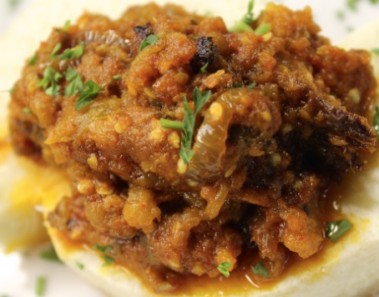
Your Aganyin stew is ready. Please note that the end result of your stew must be of slightly thick consistency with a lot of palm oil all over as that is the ideal form for the delicacy. So, you could extend the cooking period to achieve this result.

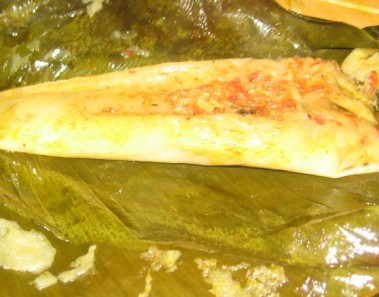
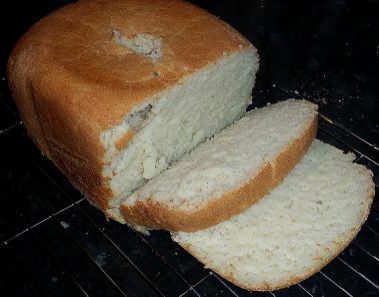
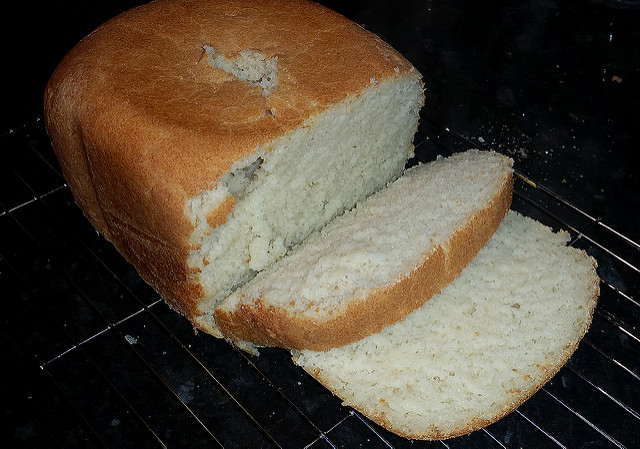
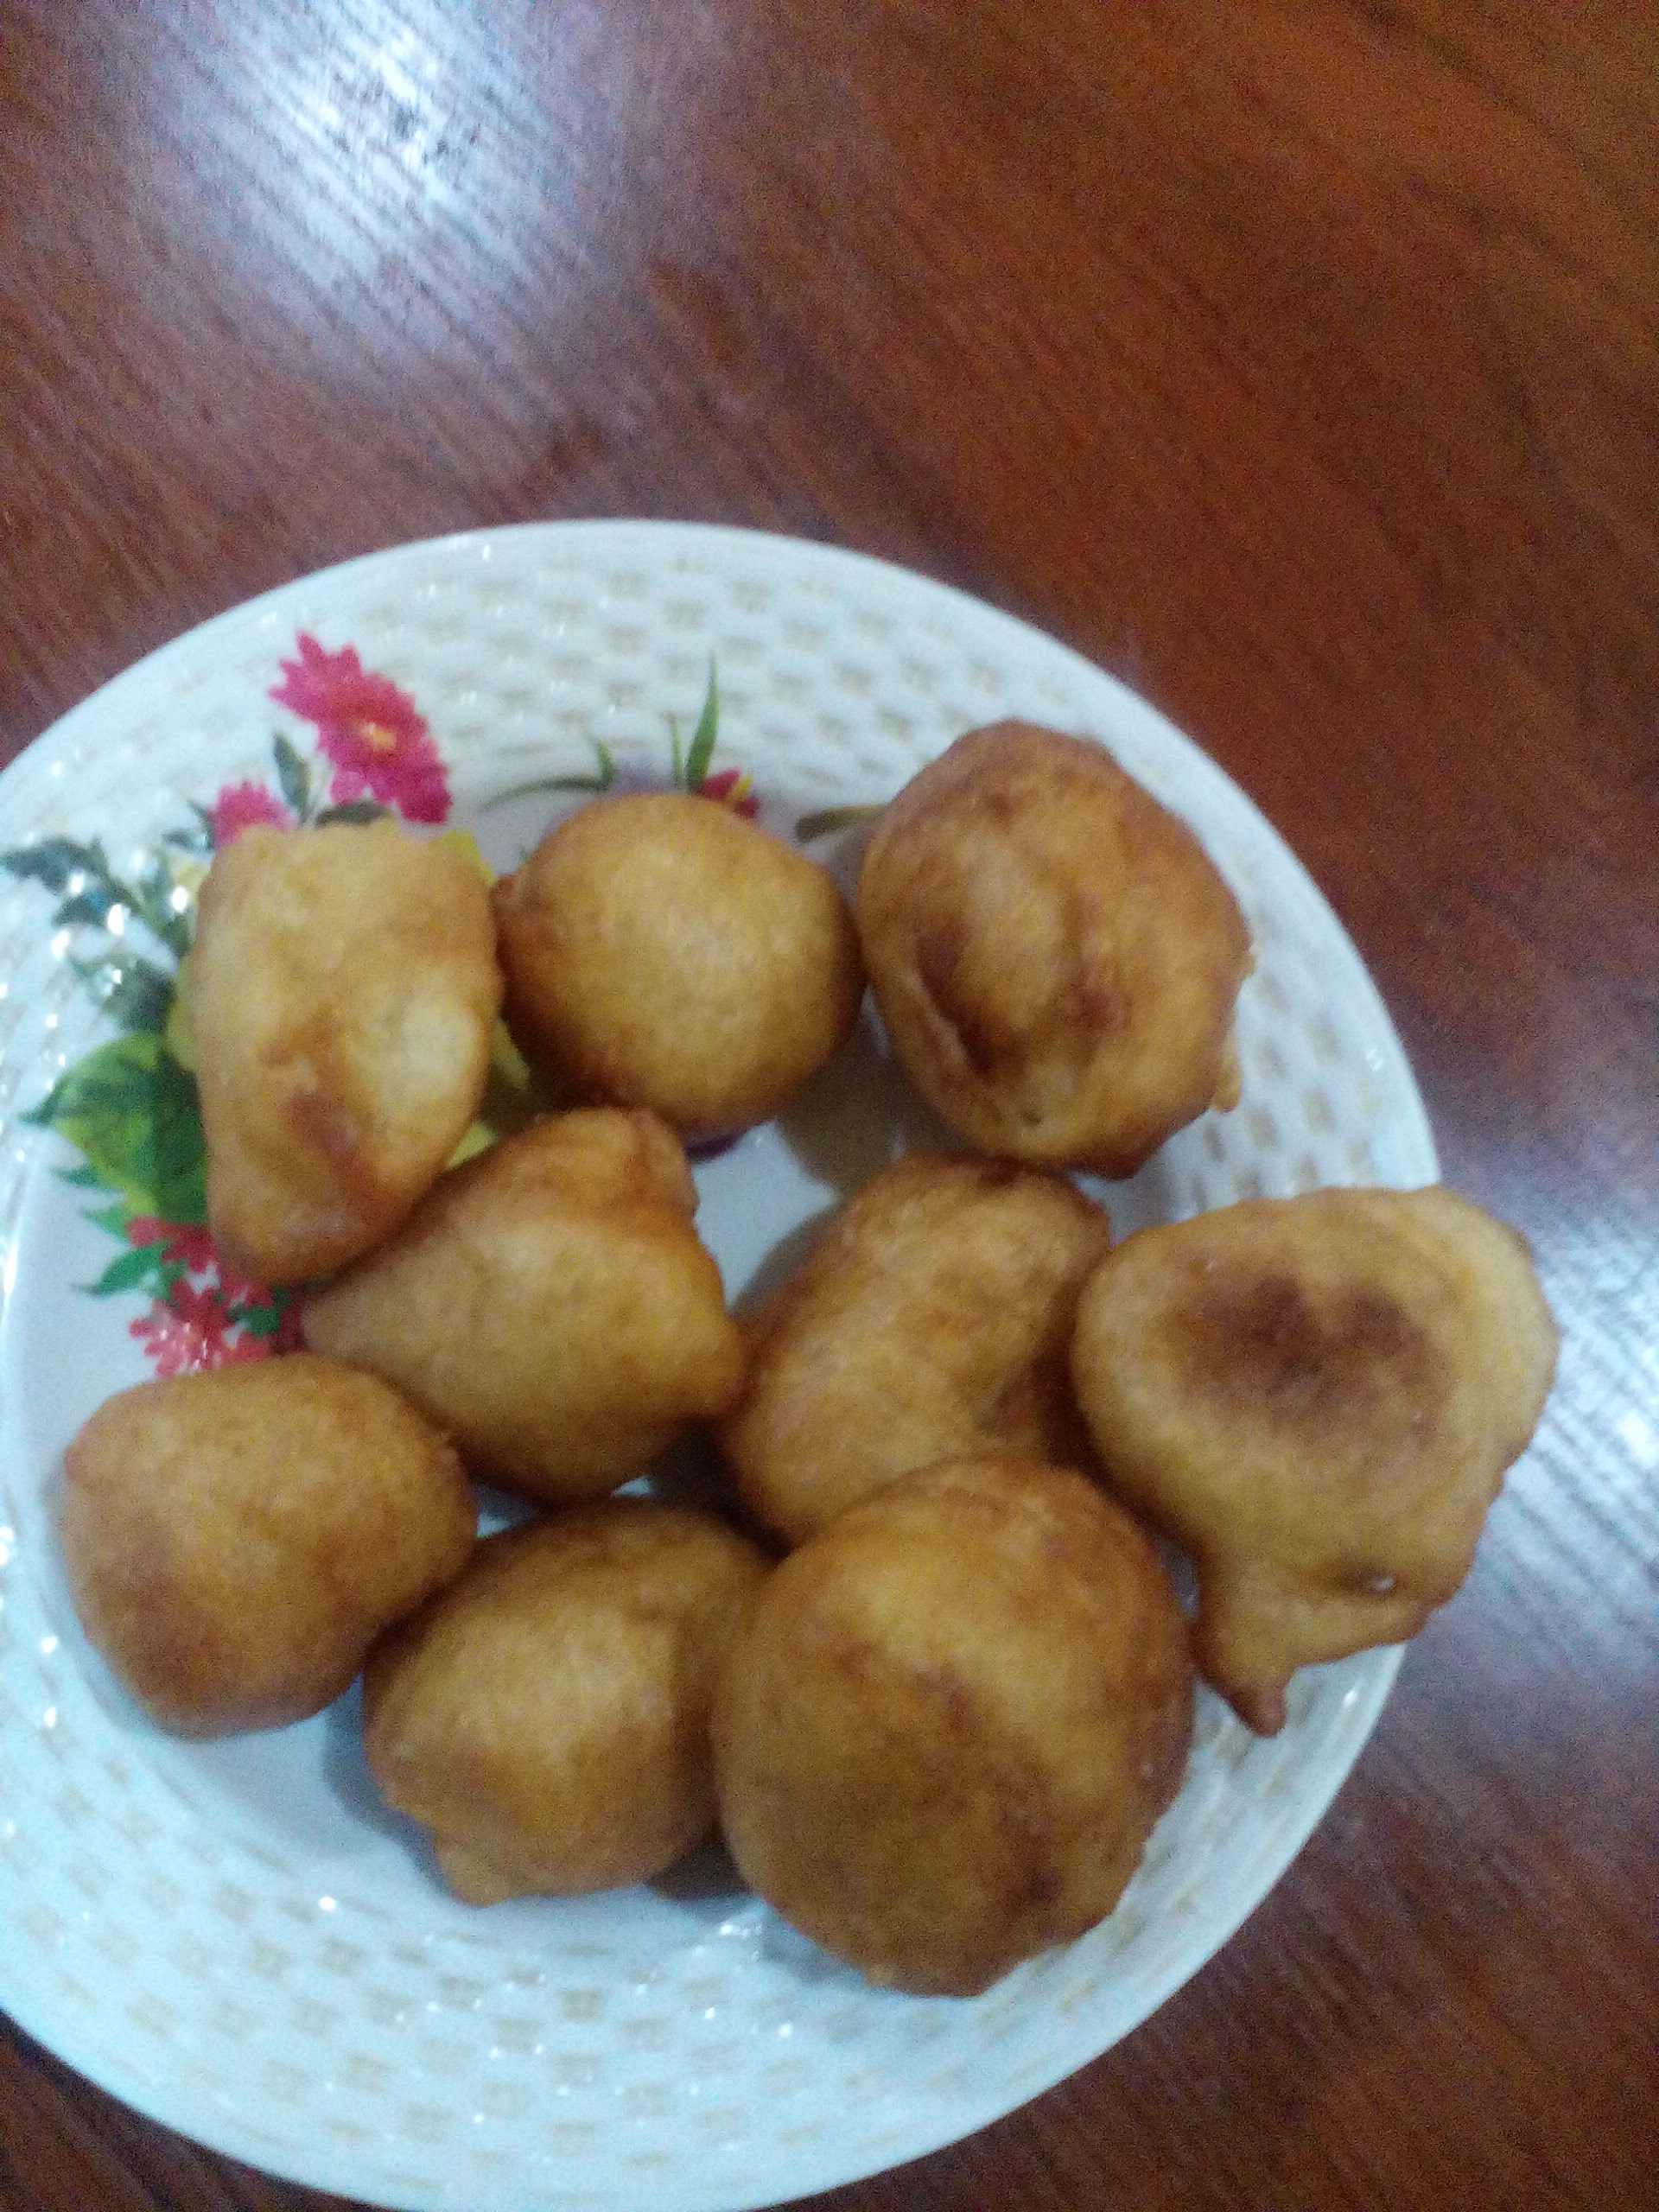
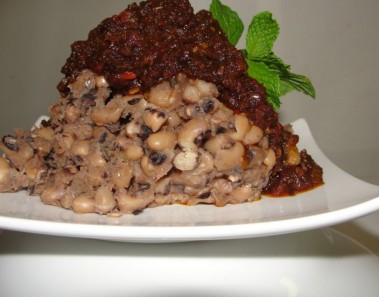
Dish out the beans and pour the sauce over the top of it. Serve with Agege bread or fried plantain.

Categories
Smoothies

How To Make A Healthy Ginger Juice

Very few people are aware of the fact that a healthy juice be extracted from ginger root. I got the idea to write about this shortly after I heard how an elderly woman got relieved from her ill condition after drinking some portions of ginger juice. What interests me about this drink is that it is completely easy to make and yet contains numerous nutritional and medicinal benefits.

ginger juice
Photo: newhealthguide.org

I have had the rare opportunity of improving the high blood pressure level of my mum and some patients after placing them on ginger root chopped pieces but not as a  juice and it worked really well. This juice method makes it easier for every one to include in their diet rather than eating ginger raw. So, Lets see how this healthy drink is made.

Ingredients for Making Ginger Juice

  • Some pieces of fresh ginger roots depending on the volume of juice you would like to make.
  • Water

Equipment

  • A juicer or a blender and Knife
  • A sieve or muslin cloth

Method of Production

  • Clean in running water or in a bowl of water all your ginger roots until you are certain there are no extraneous matter on them.
  • Peel the ginger carefully using a small knife.
  • Cut the cleaned and peeled ginger roots into smaller pieces and place them into a juicer or a blender. You should note that there are some juicers that are made to extract juice and separate the fibre. In this case your ginger juice is ready. Using a juicer is a better method. Else?
  • If the ginger was blended, you must pour the blended ginger solution through a sieve to allow the separation of the juice. Use your hand to press for more juice extraction.
  • Your ginger juice is ready. It can be poured into a small container and placed in the refrigerator for longer keep.

Note: This juice is not to be funneled into your body directly like regular juices, you probably do not need more than three table spoons daily. It is usually consumed by adding one or two table spoons into your regular drinks and juices. Trust me, you will feel the ginger vibe in it.

Aiming at an improved immune system? #GOGINGERJUICE

Categories
Food Recipes

Learn How To Make Delicious Moi Moi From Corn

Moi moi made from beans is clearly more popular than those made from other food items. I am certain that only a few people are aware that Moi moi can be made from corn. Well, if you are just hearing this for the very first time, then you are on your way to learning a very simple step by step method that will help you add variety to you daily meal plan.

Corn Moi moi or corn cake is also known as Nni Oka, Igbankwu Oka and Ekoki, amongst other names. The meal is usually used to entertain guests particularly during traditional ceremonies.

corn moimoi

Ingredients For Corn Moi Moi

  • 10 pieces Fresh corn still on its cobs.
  • 2 big sizes of Onions and Scotch bunnet pepper (Ata rodo) to taste.
  • Two handfuls of Crayfish, 2 big sizes of smoked fish and a tin of fresh prawn.
  • Water and 4-5 cooking spoon of Palm oil (Until the mixture turns yellow). Usually corn absorbs more palm oil than beans.
  • Cube seasoning and Salt to tast Usually 1 -3 cubes of seasoning will be fine.

Method Of Preparation

  • Peel of the husk and hair-like strands. Then remove the corn seeds from the cobs and get them washed properly.
  • Pour the corn seeds into a powerful blender, add small amount of water; to ease the movement of the blender’s blade. Add pepper, chopped onions and the cooked or steamed fresh prawns
  • Blend until completely smooth.
  • Pour into a big bowl.
  • Add palm oil, pieces of de-boned smoked fish, crayfish, cube seasoning and water to dilute the solution slightly just like you would do to to the regular Moi moi. Then stir properly. You could also add other food items to make the cake rich.
  • Portion into small containers or folded leaves or heat-resistant nylon and place each of them into a pot half filled with boiling water on a cooker. Do not forget to seal the each of the containers.
  • Cook for between 45 minutes to 1 hour. By that time, the solution should have solidified and ready.
  • Place on tray and allow cooling.

Your corn cake or corn Moi moi is ready to be served. Enjoy it!

Categories
Food Recipes

How To Make Gluten-Free Bread For Celiac Disease Patients

People suffering from celiac disease or gluten-induced enteropathy will find gluten-free bread suitable. What we do in the production of gluten-free bread is basically to eliminate flours with gluten-rich protein from the ingredients list.

Next, we will be defining the key terms in this article — Celiac Disease and Gluten. We all should know what bread is. If you don’t know what a bread is, tell me where you come from, perhaps I could make some effort to understand.

What Is Celiac Disease?

Celiac Disease is estimated to affect 1 in 100 people worldwide. It is an autoimmune disorder that can occur in genetically predisposed people where the ingestion of gluten leads to damage in the small intestine (celiac.org). Click here to read more on Celiac Disease (symptoms, tests and treatment).

What Is Gluten?

Gluten is a protein found in many types of foods including but not limited to rye, barley and wheat (used in making bread and some other pastries). Gluten helps foods maintain their shape, acting as a glue that holds food together.

How To Make Gluten-Free Bread

How To Make Bread Free from Gluten (Ingredients and Instructions)

Below are the materials and ingredients neeeded with prepapration instructions.

Material Needed For Production

  • Loaf tin
  • On-stick paper
  • A piece of bowl
  • Teaspoon
  • Measuring jar
  • Kitchen measuring scale
  • 130 ml of warm water
  • 150g of corn flour
  • 15g fresh yeast

Ingredients for making Gluten-free Bread

  • 1/2 teaspoon Salt
  • 1/2 teaspoon Sugar
  • 50g dried Skim Milk Powder
  • 10g melted fat (Butter or Margarine)

Instructions for Preparing Gluten-free Bread at Home

  1. Sprinkle the yeast into some warm water, add sugar and keep the mixture in a warm environment for about 20-30 minutes.
  2. Mix the corn flour, salt, milk powder, the yeast plus sugar mixture and melted fat in the bowl. Mix thoroughly to get a smooth, creamy thick batter.
  3. Pour it into an already lined baking tin with non-stick paper.
  4. Allow to proof in a warm place.
  5. Preheat the oven to 175-180°C
  6. Bake until the internal temperature of the bread reaches 99°C (the center should feel firm and fringy at this point).
  7. Remove bread from oven and allow to cool

Important Warning on Yeast:

The Baker’s yeast, “Saccharomyces cerevisiae” is a fungus and is naturally gluten-free. I can inform you that some packaged yeasts are NOT gluten-free. Therefore, it is important to always check the label.

Categories
Food Recipes

Simple Way To Make Tomato Ketchup At Home

We have all eaten tomato ketchup at some points in our lives to eat foods like fries and chicken. Wouldn’t it be nice if we could make your own fresh tomato ketchup at home? You can make it the way you like it. If you like your ketchup spicy, you can add as much chilli as you want. If you like it more or less sour, you can control the quantity of vinegar in it. The possibilities are endless.

Some of the popular ones include Heinz and Maggi. Tomato ketchup is a sauce prepared using clean tomato in addition to ingredients such as sugar syrup, salt, vinegar, colour (optional), onions, garlic and other spices. Tomato ketchup usually contains about 12% tomato solids. Surprising right?

Make Tomato Ketchup At Home

How To Make Tomato Ketchup At Home [The Recipe]

Below are the materials (kitchen utensils and appliances) and ingredients that you need to prepare tomato ketchup at home.

Material Needed

  • Blender
  • Gas/Electric Cooker
  • Weighing Balance
  • Cooking  Pots
  • Muslin Cloth
  • Sieve
  • Stirrers

Ingredients For Making Tomato Ketchup (Recipe)

  • Tomato Juice (3.5 litres)
  • Salt (97.5 g)
  • Sugar (170 g)
  • Vinegar (27.22 g)
  • Chopped Onions (56.7 g)
  • Ground Cinnamon (3.36 g)
  • Chopped Garlic (2.20 g)
  • Penang Mace (tone) (0.50 g)
  • Ground Cloves (2.13 g)
  • Powdered paprika (0.50 g)
  • Chilli (25.06 g)
  • Ground White Pepper (25.06g)
  • Colour (4-5 drops)

Procedure for preparing the Tomato Ketchup

  • Sort your tomatoes such that you only have the good ones
  • Immerse tomatoes (whole) in hot water standing at 90ºC for 3-6 seconds. Spray with cold water.
  • Peel off tomato skin by pulling the skin back from the blossom end
  • Remove the seed cavity neatly with a knife
  • Pulp the tomatoes in a blender and strain (you only need 3.5 litres of it)
  • Heat the tomato pulp in an open pan for 1 hour at 90ºC
  • While boiling, add all spices and salt into the boiling puree. Add the sugar syrup.
  • Boil until you have the consistency you desire.

Allow the ketchup to cool. You can serve with the food of your choice and store the rest in your refrigerator.

Categories
Food Recipes

How To Make Sausage Muffins [Recipe]

This is a recipe for making sausage muffins submitted by Chef Esther and she has the following to say;

Its Chef Esther, hope your week is going great because mine is. This bite sized goodies are so so delicious that you will keep asking for more. Super easy and fast to make. Happy baking!!!!!

Sausage Muffins Recipe

The following are the instructions and ingredients for making delicious sausage muffins.

Sausage Muffin Ingredients

1 cup all-purpose flour

½ tsp Baking powder

2-4 tbsp. Sugar (to taste)

½ cup Melted salted butter

¼ cup Milk

1 tsp vanilla extract

2 large eggs (for the batter)

Non-stick spray or melted butter for brushing muffin pan

Filling

3 large sausages cut into three each

Instructions for Preparing Sausage Muffins

Add the 2 eggs and sugar in a mixing bowl and whisk until the sugar dissolves which is about 2 minutes

Add the all-purpose flour, baking powder, melted salted butter, milk and vanilla essence into the bowl. Mix until you have a batter with no lumps.

Prepare the muffin pan by brushing lightly with melted butter or spray with non-stick spray.

Spoon 2-3 tablespoon batter evenly into each muffin pan. Place the sausage in the middle of the batter or however you like it and place in the oven.

Bake in preheated oven at 180c for 15-20 minutes or until golden brown.

Here you have your Sausage Muffins;

sausage muffins sausage muffins

Serve warm and enjoy.

Categories
Food Recipes

Chicken And Moringa Tomato Sauce Recipe

This is a chicken and Moringa tomato sauce recipe submitted by Chef Esther (Esther Ibizugbe). She uses a combination of chicken and moringa in tomato sauce. Below is her recipe with ingredients, instructions and other tips.

If you have ever read the article we published in the past about the importance of Moringa, you will know how important that plant is. Don’t get it confused, the post talked about seeds. This one right here is talkin about Moringa seeds.

Chicken And Moringa Tomato Sauce Recipe

Chicken And Moringa Tomato Sauce Recipe – Chef Esther

Chef Esther says;

Hey all, you know how most people say Moringa leaves can cure everything (don’t know how true that is oo), well my Mum (Chairlady) decided to plant the tree within the house. It is easy to plant and they grow really fast.

Anyways I ran out vegetables today and decided to try out the fresh Moringa leaves for a change and it came out amazing and tastes great. I hope you try this out and remember you can always substitute ingredients. 

Ingredients For Making Chicken And Moringa Tomato Sauce

Below are the ingredients you need to make your own Chicken-moringa tomato sauce;

  • Moringa leaves (washed)
  • Tomatoes
  • Pepper
  • Onions
  • Ginger (peeled)
  • Garlic (peeled)
  • Knorr cubes
  • Curry
  • Thyme
  • Tomato paste
  • Grinded crayfish
  • Canola oil (can use whichever you have)
  • Chicken (boiled or fried)
  • Chicken stock/Water

Instructions For Preparing The Chicken And Moringa Tomato Sauce

  • Place your tomato, pepper, onions, ginger, garlic and a little water in the blender and grind to a paste, depending on your preferred consistency.
  • Heat up oil in the pot for about a minute and add the chopped onions. Stir for another one minute so it does not burn before adding the blended paste.
  • Allow to boil for 5 minutes before adding chicken and grinded crayfish (people start the method by frying tomato paste first before adding the blended tomato. You can do whichever)
  • Boil for another 3-4 minutes then add tomato paste, chicken stock/water and salt to taste. If you are using chicken stock, be careful when adding the spices because they were already added when boiling the chicken, so it doesn’t become too salty.
  • After about 4 minutes, add the Moringa leaves and boil for about 2 minutes to retain the freshness and serve!

IMPORTANT NOTE:

To have a different taste and flavour, you can use seafood, beef, stock fish, etc to garnish the sauce.

ALSO SEE: Moringa Seed: Benefits & How It Helps In Weight Loss

Categories
Food Recipes

How To Make Kuli Kuli (Recipe)

This post will show you the ingredients and instructions needed to make Kuli-Kuli (called Kulinkuli by some). Sometimes called German stones, the rock or peanut balls; kuli kuli which has many names based on the location is one major snack of which I am certain that all children within Nigeria, born earlier than or in the 80s must have had a bite one time or the other. It is usually made into different shapes and sold in transparent nylons.

In the early 90s during my primary school days, hardly would you find a young boy or girl returning home from school without some quantities of the snack as it can be enjoyed with Garri soaked in chilled water particularly during the hot afternoon.

How To Make Kuli Kuli - Recipe

Step by Step Guide On How To Make Kuli Kuli (Recipe)

Rarely seen to be consume by emerging young children for a reason best known to them or their parents, kuli kuli remains a snack to eat any day, any time. In this short post, I will be sharing with you step by step method on the making Kuli kuli, a popular Nigerian snacks.

Ingredients For Making Kuli Kuli

Below are the essential kulikuli ingredients. With this recipe, you can make your Kulikuli at home.

  • 2 cups of peeled, salted and roasted groundnuts
  • Groundnut oil and a tea spoon of ground pepper
  • One and half teas spoon of ginger powder or to taste
  • Kahun (Optional)

Kitchen Utensils and Appliances Needed 

  • A food processor
  • A non sticky frying pot
  • Muslin cloth
  • Spider and a Plastic bowl

How To Make Kuli Kuli (Procedure)

  • Pour the groundnuts and ginger into the powerful food processor, and set to rotate until the nuts are almost turning to a pasty cream.
  • Scoop the pasty nut into a clean and dry muslin cloth and squeeze out the oil as much as you can. Do not expect to see a lot of oil. This step is very key as it determines the crunchiness of the kulikuli.
  • Pour the mashy peanut into a plastic bowl, add the powdered ground pepper.
  • Mix the constituents using your fingers and shape using your palms to your preferred size.
  • Place the non-sticky cooking pot on cooker and add some groundnut oil enough to fry the balls. You could also sprinkle some kahun (potash) into the oil but this is optional. You could also add some rings of onion to provide some flavours.
  • Just before the temperature of the oil gets to frying point, add the shaped balls (or rods or pellets) into it and keep stirring until all sides of the balls turns brown.
  • Scoop out using a spider into a plate and allow to cool.

Kuli-Kuli is ready and can be served with any kind of flakes. Usually it is enjoyed with cassava flakes (Garri) soaked in cold water.

If you have a special recipe for Kuli kuli that you’d like to share with us, please send to us using our contact from. We will publish it here and give you full credit for your work.

Categories
Food Recipes

How To Make Tiger Nut Milk

Just recently I wrote on the health and nutritional benefits of consuming tiger nut as a snack. When I share the article with some of my friends, a few of them complained that they do not like the tiger tubers because of the chaff. Having heard this from them, this prompted to write on how to make tiger nut milk; an alternative which helps you benefit from the nuts…I mean tubers.

Tiger nut milk is a healthy non dairy alternative for vegetarians. Many of them stick with soy milk and coconut milk not knowing that tiger nut milk even possess more nutritional benefits. Asides being healthy, the drink is also delicious. In this short post, you will see simple steps on how to make tiger nut milk in your kitchen.

How To Make Tiger Nut Milk

Equipments Needed For Making Tiger Nut Milk

  • A powerful blender
  • Muslin clothe
  • A plastic container with lid

Instructions For Preparing Tiger Nut

  • Properly wash the raw tiger nuts in running water until very clean. 1kg of the tubers will be enough to make tiger nut milk for a family of five.
  • Pour the clean tiger nuts into a plastic container and add enough water to cover the tubers up and place the lid over it.
  • Place the container in a refrigerator for 48hrs.  You could decide to keep it for 72hours. The longer you allowed the tubers absolve water and soften, the better. The reason for keeping in the refrigerator is to avoid fermentation of the tubers which will alter the taste.
  • After 48hrs, collect the container, strain water away and remove the deteriorated tubers. Wash properly again under running water.
  • Pour the tiger nuts into a powerful blender and add enough water that will allow the blades to move and blend the tubers. You could add more water in this process to obtain your preferred consistency.
  • Pour the thick solution over a muslin clothe and completely strain out the milk. You could add more water to the chaff in order to strain out more milk.
  • Add other ingredients to it based on your preference. I personally love to enjoy the natural and refreshing taste. Keep in the refrigerator or add some ice and enjoy.

If you do try this recipe, please do not forget to share with us the outcome. We would be glad to hear from you.

Categories
Food Recipes

Learn How To Make Spicy Banana Chips At Home

I have always supported the idea of home made snacks more than the regular processed snacks sold in many grocery stores. One of such snacks is banana chips especially when it is well made. Children and middle aged people would love it. Plantain chips seem to be more common here in Nigeria but the very first time I tasted banana chip, it became love at first bite.

baked banana chips

Ingredients For Making Spicy Banana Chips

  • Three big size, semi ripe fingers of banana
  • A table spoon of lemon juice
  • Water
  • Salt ( Optional)
  • Butter or non sticky cooking spray

Equipment Needed

  • Knife
  • Oven
  • Foil paper

Instructions For Making Baked Banana Chips Is Made

The process involved is quite simple and you could involve your teenage children in the process of making banana chips. It is as follows;

  • Peel you banana fingers one after the other. Mean while, as you are performing this activity, pull out the tray in the oven and set it to a temperature of between 180-200F.
  • Slice them into tiny pieces (1/8inch) in a slanting vertical version and set aside.
  • Pour a table spoon of lemon juice into about 50cl of water, add a dash of salt, mix well and submerge the sliced banana into the solution and take out immediately. Do not do all at once, do it in batches and set aside
  • Cover the tray with a foil paper and rub slightly with butter or spray with a non sticky cooking spray to avoid sticking.
  • Carefully place the sliced banana on it one after the other and return to the heated oven.
  • Keep in the oven for 80mins and check. Turn slices, once they are in your preferred baked colour and place in oven for another 30mins.  Do not forget to check at 20 min mark to avoid over burnt bananas.
  • Fetch them out of the oven once they are ready and air dry. The longer you air dry them, the crispier  they are.
  • Once they are dry enough, keep in air dry container.

Your crispy baked banana chips are ready for consumption. The good thing about this is that they can be included and portioned out as snacks for your children when going to school. It is healthier than the sweetened ones sold in supermarkets and not difficult to make.

When you do try this, do not forget to get back to us.

Categories
Smoothies

Things To Consider Before Taking Fruits Smoothie As Breakfast

Just before you Take fruit smoothie as Breakfast, Read this: Fruit smoothies are definitely a good and nutritious option for improved growth and immunity for all ages. In fact, most nutritionists would not hesitate to include certain smoothies into the diets of their patients especially breakfast meals as these smoothies can be easily made and consumed. Having said that, although smoothies are good but consuming smoothie as breakfast can cause some serious stomach upset in certain individuals and it is important that you consider this before funneling some fruit smoothies into your system.

banana tangerine milk smoothie

A colleague of mine, in her quest to flatten her tummy started consuming fruit smoothie as breakfast. In her first day, it all went fine but after some days, she started noticing and feeling serious tummy discomfort. Unknown to her, she continued until she finally discovered that it could be as a result of the fruit smoothie she had started consuming as breakfast. In many young women, fructose mal-absorption is  a common occurrence.

When you are thinking of consuming fruit smoothie as breakfast, you should also consider the acid content of some of the fruit combination involved in the smoothie. Consuming such meal as breakfast, on a empty stomach could be a good step in the wrong direction particularly for ulcer patients. It is much more ideal to combine fruit smoothie with other food groups as breakfast rather that consume them as the main meal especially if you are prone to stomach discomfort. One fruit smoothie that I have found to be friendly with the stomach is that made from mature bananas. Smoothies containing papaya as a major constituent has been discovered to cause upset in certain people particularly if consumed as breakfast on an empty tummy

Another reason you might want to reconsider the fruit choices  for your breakfast is that some fruits are harder to digest than others and may cause  gas and bloating. Examples include cabbage, apples, blackberries, mango and papaya.

Smoothies are a good way to get healthy doses of fibre however it is critical to consider your body chemistry and tolerance before choosing to consume any smoothie particularly during breakfast.

RECOMMENDED: How To Make This Healthy Delicious Fruit Smoothie

Categories
Food Recipes

Learn How To Make Isi-Ewu (Goat Head Meat Soup) At Home

I have never for once come to agree with myself on which part of Nigeria has the best soups especially considering the array of soups that are peculiar among the Easterners and the South southerners.  You will agree with me that it is a tough competition between these groups of people. While I ponder about this in my small apartment, a female friend who came visiting had a cooler of Isi-Ewu with her.

isi ewu goat head

As I ate a plate of the meaty soup, I could not but ask for more and I felt it would be nice to get the recipe from her and share with you on this platform. Isi- Ewu is made from goat head and I bet a bite will surely convince you to eat more.

How To Cook (Prepare) Isi-ewu (Goat Head Soup)

Here are the ingredients that you need with instructions to prepare your own Isi-ewu at home. Follow the recipe/guide step by step and you are sure to make a delicious pot of Isi-ewu.

The Ingredients For Isi-Ewu

  • One goat head
  • 2 big Onions bulbs,
  • 2-3 roasted calabash nutmeg,
  • 4 pieces of habenero peppers (Ata rodo),
  • 2 meat flavour seasoning cubes and salt to taste.
  • 20cl or 200ml of Palm oil
  • Enough water to cook the meat
  • Tyme, curry and potash (Kaun)
  • Ground crayfish and sliced Utazi leaves

Note: The utazi leaf is included to add some bitter flavour to the Isi-Ewu while potash (kaun) is added to make the palm oil curdle up.

Pre-Cooking Step In Making Isi-Ewu

  • Get your goat head chopped into smaller pieces. This could be done by the meat sellers. Wash the entire meat pieces properly using foam and iron sponge to remove dirt particularly in the ears and tongue part. Keep aside.
  • Wash and slice the fresh utazi leaves into tiny pieces just like you would do for your vegetables and set aside.
  • Soak a tea spoon of potash or kaun in small amount of water, let it dissolve well and sieve the water; then set aside the water.
  • Peel, wash and slice one onion bulb into ring forms and set aside.
  • Blend the other onion bulb and pepper into pasty form. Add only little amount of water if you must blend. It is better if you can pound them. Set aside.

Main Cooking Steps (Instructions)

  • Place the goat meat pieces into a large pot and place on a cooker
  • Pour a little amount of water just enough to cook the meat. This is because there is no need for stock water. Add the two cube seasonings, a tea spoon each of thyme and curry. Cook for about 20 minutes.
  • Add salt and let it simmer for another 10 minutes. When the meat pieces are tender enough, set aside.
  • In another pot, add palm oil, pour the sieved water of the potash slowly into the pot containing palm oil and stir using a wooden spatula until the oil turns completely yellow.
  • Add two table spoons of crayfish and stir.
  • Add the grounded (Ehu seeds) calabash nut meg, grounded or blended onions and pepper (to taste) and less than a handful of sliced utazi leaves. Stir properly.
  • Pour the cooked goat head meat pieces into this mixture and stir well.
  • Place on cooker and let it simmer for few minutes under low heat until it is piping hot. Do not forget to cover the pot during the cooking process.

Your Isi Ewu is ready to be served!

In many Nigerian restaurants, Isi Ewu is served in a calabash or some wooden material with a sprinkle of small quantity of onion rings and some slices of fresh Utazi leaves on it. This makes it very native and colourful. I bet you will love it. In less than 1hour, you should be done with the entire process of making this native meal.

I sincerely hope you will find this recipe helpful.

Categories
Food Recipes

How To Make A Delicious / Nutritious Tomato Bread

We all know that bread is full of carbohydrate and anyone striving to always get a balanced meal in terms of nutrients should not eat bread alone. There are several other types of foods that we eat bread with in this part of the world — beans, fried and boiled egg, margarine, mayonnaise, stews — to mention a few, but we can even make it more interesting.

How about making this more interesting and nutritious by using tomatoes with your bread to make what is called “tomato bread”? Don’t write it off yet until you have tasted it and do not like it but I think you should like the taste and nutritional benefits tomatoes bring into the combo.

tomato bread

Adding olive oil and garlic into the mix will make it even better. If you read the articles we wrote on how garlic helps improve sperm quality in men and how olive oil works as an anti-ageing agent, you would want to add them to your tomato bread.

Ingredients For Making Tomato Bread

  • 4 slices of Bread
  • 2 ripe Tomatoes (each sliced into two)
  • 1 Garlic clove (finely chopped)
  • 2 tablespoon of olive oil (optional)

Equipment Needed

  • A Grill or Toaster
  • A Knife

Instructions For Making Your Tomato Bread

  • Preheat the grill, then toast the bread under a hot grill until you get lightly golden brown on both sides of the sliced bread.
  • Now rub each slice of the bread with half a fresh juicy tomato. If you decide to use any of garlic and olive oil, sprinkle a little of each over the top.
  • You can cut into smaller sizes, serve and eat immediately.

Some cannot eat fresh tomato as it is, so they put all the ingredients in-between two slices of bread before heating in the toaster. This makes the tomato a bit cooked and tastier but remember that it is at the detriment of some nutrients.

You can give this a try at home for your breakfast and share your experience and pictures with us. You can make your comments below. You can send pictures to us foodsng2015@gmail.com and we shall duly attribute them to you.

TIPS & WARNINGS:

Categories
Food Recipes

How To Make Puff-Puff; One Of Most Consumed Nigerian Snack

I can confidently bet, a well made puff puff will surely make you ask for more any day, anytime. As this snack seem to be quite popular in all the cities here in Nigeria, it will surprise you to know that many people who are lovers of it do not know how to make it.

I must admit that a few have clues but many are in doubt of the simple steps in making the fluffy, brown tasty snack.  I will be sharing with you how you can make puff-puff for your personal consumption or events. No doubt, it will surely wow your friends and family or guests.

ready-to-eat puff puff

How To Make Your Own Puff Puff At Home

What Are The Ingredients?

  • Flour (1kg)
  • Active dry yeast (20grams)
  • Water (As appropriate), 1 or 2 pinches of salt and sugar (between 150-200grams)
  • Nut meg (Optional)
  • Vegetable oil

In the quest of many to make puff puff rich, they have added eggs and milk. This most times does not produce good puff puff. I usually do not add them. They are not necessary. If you must, it must be in very small quantities.

Direction On How To Make Nigerian Puff Puff

Wash your hands clean with soap and water.

Pour all the dry items like flour, sugar, salt, active dry yeast and nutmeg into a bowl. Gradually pour warm water to make it rise quickly and mix thoroughly with your hands until the mixture turns pasty but not watery with no lump.

how to make puff puff 2

Cover the mixture with a  foil paper or any other item that will make it air tight and keep in a warm place for about an hour. After the period, the batter would have risen to almost double its previous height and become thicker with foamy top.

Pour oil into a frying pot and place on cooker under low heat.

When the oil is hot, use your hand to shape the batter to form round like shape and drop into the hot oil. Do this until there  no more space for more.

how to fry puff puff

Allow to fry until all sides turns into golden brown colour. This can be achieved by flipping the puff puff using a folk or long spoon every 30 seconds on the average.

Scoop out and keep them in a sieve place over a bowl or plate to allow some of the oil to drain into the bowl.

how to make puff puff 5

Your puff puff is ready to be served.

ready-to-eat puff puff

For 1Kg flour as used above, you should get about 60 pieces of the size of puff puff seen in the picture above. It can be served with a chilled orange juice or Zobo drink. I particularly love it with Zobo. Learn how to make Zobo drink.

Categories
Food Recipes

2 Simple Chocolate Cake Recipes You Can Make At Home

I love cakes and those that make cakes for me know my love for the chocolate flavour. I have friends that make cakes and I have a sister that does that too, so, it’s a kind of blessing. Don’t get me wrong I don’t eat cake every day and I don’t crave it, but I do eat it when I feel like.

I make orders for chocolate cakes at times like these and keep inside the refrigerator. Don’t copy me if you don’t exercise because you would only increase your chance of adding weight. I recently discussed with some of those that make cakes for me and they agreed to share some simple chocolate cake recipes but they haven’t. I learned some myself and I am posting them for those that might be interested.

Simple Chocolate Cake Recipe

There are so many recipes for chocolate cakes that turn out fine and delicious, but when I talk about simple chocolate cake recipes, I am referring to those that meet the following criteria that have been set by me:

  • Contain chocolate
  • Small in size (you can actually make into any size)
  • Have ingredients that are easy to get around
  • Will be ready in about an hour
  • Delicious

Hence, the reason for just 3 to be discussed in this article. This post has taught me that different people have different ways of making their foods. Therefore, if you have a good, delicious simple recipe for chocolate cakes, share with us and we will credit you for it.

Simple Chocolate Cake Recipe Number 1

Ingredients:

  • 1 cup white sugar
  • 1 1/8 cups flour
  • 1/2 cup cocoa powder (use the unsweetened one)
  • 1 teaspoon baking soda
  • 1 teaspoon salt
  • 1/2 cup butter or (margarine if you can’t get butter)
  • 1 egg
  • 1 teaspoon vanilla extract
  • 1 cup cold, strong, brewed coffee
simple chocolate cake 1

Instructions:

  1. The first thing you need to do is to put on your oven and let it heat up to around 170-175°C.
  2. Lubricate the inside of the pan you decide to use with butter, some groundnut oil or margarine
  3. Sift the flour, cocoa, baking soda and salt together and set on one side.
  4. Take a bowl and cream butter and sugar together until you get the light and fluffy texture.
  5. Add the egg and vanilla to (4) above and beat well.
  6. Add flour mixture in (3) above, alternating with coffee. Beat together.
  7. Bake at 175°C for 40 to 45 minutes and you will get the cake pictured above.

How To Make A Chocolate Chip Cake

Ingredients for the cake

  • 200g plain flour
  • 220g dark brown soft sugar
  • 4 tablespoons unsweetened cocoa powder
  • 1 teaspoon baking soda
  • 1 teaspoon salt
  • 75ml vegetable oil
  • 1 tablespoon vinegar
  • 2 teaspoons vanilla extract
  • 250ml milk
  • 170g plain chocolate chips
simple chocolate cake chip 2

Instruction for preparation

Preheat the baking oven as in the previous procedure to 175 – 18°C

  1. Lubricate and flour the square tin you want to use (20cm for this)
  2. Add all the flour, dark brown soft sugar, cocoa powder, baking soda and salt in the prepared tin.
  3. Mix these ingredients well together with an eating fork.
  4. Make three round holes in the mixture of the ingredients and pour oil in the first, vinegar in the second and vanilla in the third one.
  5. Pour milk inside, over all the ingredients and mix with a fork until well blended.
  6. You can now pour the chocolate chips over the top.
  7. Bake in the preheated oven for 30 minutes and you will see that the case would have risen above the tin.
  8. Allow the cake to cool in the tin for 15 minutes
  9. Cut and serve from the tin.

If you try these out on your own, let us know how it turns out

If you have another chocolate cake recipe that is simple (easy to make), please share it with us by sending it to foodsng2015@gmail.com. We shall duly credit you for the recipe. Thank you!

Categories
Food Recipes

How To Make Garden Egg Sauce (Recipe)

Hello friends, it is time to learn how to make my favourite stews. People around me ask-why I love this so much. I answer; because it is healthier than most of others stews we consume daily.  Do not forget to read from the previous article I posted on how garden eggs can improve your health.

If you have not eaten garden eggs sauce before, this is a one time opportunity to give it a shot and you will be thankful you did. Lets go straight to the steps involved in making garden egg sauce delicious.

garden egg sauce

Ingredients for making Garden Egg Sauce

  • 10 average size of garden eggs ( I prefer the white ones)
  • 5-6 pieces average size of pepper, 2-3 pieces average size of tomatoes and one large size of onions.
  • Iru ( Completely optional), Cube seasonings and Salt
  • Palm oil (3 cooking spoons). You could add more if need be
  • 2-3 Boiled Titus fish or smoked fish (I prefer the roasted one)
  • Some amount of water

Method Of Preparation

  • Purchase about 10 fresh average size green or white type of garden eggs. Wash then clean in a running water.
  • Cut and dice into tiny pieces and pour into a powerful blender.
  • Add enough water to make the blades of the blender oscillate.
  • Blend until it has a very smooth thick consistency.

Pour the pasty garden egg into a clean cooking pot and cook for 2-3 minutes until it further thickens under low heat. Ensure you continuously stir to avoid burnt garden egg puree. Keep this aside.

  • Dice a big size onions into smaller pieces and set aside.
  • Use a hand blender to blend two to three average size tomato and plenty pepper (rhodo) and set aside. If you do not like pepper you could reduce the ratio to your preference. You could pound this to form a paste if you can.
  • Using your clean hands, cut your roasted fish into smaller pieces and set aside.
  • How To Make The Gargen Egg Sauce
  • Pour about three cooking spoons of palm oil into a clean non sticky big frying pot or pan placed on a cooker. Ensure low heat.
  • When the oil is hot, had you diced onions. I seriously love onions, so I used a very big size. Stir for about 15- 20seconds.
  • Add your prepared garden egg paste and allow to cook by covering the pot under low heat for about 10minutes. Do not forget to stir during this period. This should be done when the little water in the garden egg puree disappears. You must stir once in a while to avoid burnt sauce.
  • Add your grated or pounded pepper, Iru pete (Mashed locust beans but optional based on your preference) and cube seasoning and salt to taste. Allow to cook for some minutes. You could add a little water to give room for the further cooking but ensure you sauce ends up in a thick consistency usually with no water.
  • Add the boiled Titus or roasted fish and stir. Do this not more than 90 seconds.
  • Your garden egg sauce is ready to be served with boiled or fried yam, boiled or fried plantain and boiled rice

If you do have time to try out this recipe, do not forget to share your experience here. In fact you could be adventurous with the ingredients to make the sauce.

ALSO SEE: See How Garden Egg Can Boost Your Health